The complete practical guide to Docker: from zero to cluster in AWS
the
Contents
the
-
the
- Questions and answers
the - Introduction
the-
the
- Pre-requisites
the - computer setup
the - Pre-requisites
- Playing with Busybox 1.0
the-
the
- 1.1 Docker Run
the - 1.2 Terminology
the - 1.1 Docker Run
- Web 2.0 apps and Docker
the-
the
- 2.1 Static sites
the - Images 2.2
the - 2.3 Our first image
the - Dockerfile 2.4
the - 2.5 Docker on AWS
the - 2.1 Static sites
- 3.0 Mnogochislennye environment
the-
the
- 3.1 SF Food Trucks
the - 3.2 Network Docker
the - 3.3 Docker Compose
the - 3.4 AWS Elastic Container Service
the - 3.1 SF Food Trucks
- 4.0 Conclusion
the
Questions and answers
the
What is Docker?
the Definition of Docker Wikipedia is:
the software to automate the deployment and management of applications in a virtualization environment operating system; allows you to package an application with all its environment and dependencies in the container and also provides a framework for managing containers.
Wow! As a lot of information. in Simple words, Docker is a tool that allows developers, system administrators, and other professionals to depsoit their applications in the sandbox (which is called containers), to run on the target operating system, e.g. Linux. The key advantage of Docker is that it allows users package the app with all its dependencies in a standardized module for development. Unlike VMS, containers do not create such an additional load, so they can use the system and resources more effectively.
the
What is a container?
the industry Standard today is to use virtual machines to run applications. Virtual machine run applications inside the guest operating system that runs on the virtual hardware of the host operating system of the server.
Virtual machines are great for total isolation of the process for almost any problems the primary operating system can not affect the software in the guest OS, and Vice versa. But this isolation comes at a price. There is a significant computational load required for iron virtualization guest OS.
Containers use a different approach: they provide similar virtual machine isolation level, but with the right involvement of low-level mechanisms of the underlying operating system are doing so with significantly less stress.
the
Why should I use them?
the Rise of Docker has been truly epic. Despite the fact that the containers are not a new technology to the Dockers, they weren't so common and popular. Docker changed the situation by providing a standard API that greatly simplified the creation and use of containers, and allowed the community to work together on libraries for work with containers. In an article published in The Register in mid-2014 says that Google supports more than two billion containers per week.
Google Trends for the word 'Docker'

In addition to the continued growth of the Docker, developer of Docker Inc. was estimated at more than two billion dollars! Due to the advantages in efficiency and portability, Docker started to get more and more support, and now stands at the head of the movement containerization (containerization). As modern developers, we need to understand this trend and find out what benefits we can get from it.
This is a comprehensive Handbook on all aspects of Docker. In addition to the clarification of myths about Docker and its ecosystem, it will allow you to get some experience on building and deploying your own web applications in the cloud. We will use Amazon Web Services to deploy static sites, and two dynamic web applications zaleplon EC2 using Elastic Beanstalk and Elastic Container Service. Even if you never got deplore, this guide will give you everything you need.
the
How to use this document
This document contains several sections, each dedicated to a specific aspect of Docker. In each section we will introduce the teams or to write code. All the code is available in repository on Github.
Introduction
Note: this tutorial uses the version of the Docker 1.12.0-rc2. If you encounter an incompatibility, please send issue. Thank you!
Pre-requisites
Everything you need to pass this Handbook is a basic skills with the command line and text editor. Experience developing web applications is helpful but not mandatory. Throughout the work we meet with some cloud services. You will need to create an account on these sites:
the
-
the
- Amazon Web Services the
- Docker Hub
computer setup
to Install and configure all necessary tools can be a difficult task, but luckily, Docker has become quite stable, and install and run it on any OS has become a very easy task. So, install the Docker.
Docker
a few releases ago, the launch of Docker on OS X and Windows was problematic. But the team did a great job, and today the whole process — simple. This tutorial is getting started includes detailed installation instructions on Mac, Linux and Windows.
to Check if everything is installed correctly:
the
$ docker run hello-world

Hello from Docker.
This message shows that your installation appears to be working correctly.
...
Python
usually Python comes preinstalled on OS X and most Linux distributions. If you need to install Python, then download the installer here.
Check the version:
the
$ python --version
2.7.11 Python
We use pip to install the packages for our application. If pip is not installed, then download version for your system.
To check, run the following command:
the
$ pip --version
pip 7.1.2 from /Library/Python/2.7/site-packages/pip-7.1.2-py2.7.egg (python 2.7)
Java (optional)
we Develop the application will use Elasticsearch for storage and retrieval. To run local Elasticsearch you will need Java. In this tutorial, everything will run inside the container, so that locally do not have to have Java. If Java is installed, the command java-version should generate a similar output:
the
$ java-version
java version "1.8.0_60"
Java(TM) SE Runtime Environment (build 1.8.0_60-b27)
Java HotSpot(TM) 64-Bit Server VM (build 25.60-b23, mixed mode)
Playing with Busybox 1.0
Now that all prerequisites are installed, it's time to get to work. In this section, we start the container Busybox on our system and try to run docker run.
For starters, run the following command:
the
$ docker pull busybox
Note: depending on how you installed Docker on your system, you may receive the message
permission denied. If you're on a Mac, make sure that the Docker engine running. If you are on Linux, run this command withsudo. Or you can create docker group to get rid of this problem.
the Command
pulldownloads the busybox image from register Docker and stores it locally. You can use the commanddocker imagesto view the list of images in the system.
the$ docker images REPOSITORY TAG IMAGE ID CREATED VIRTUAL SIZE busybox latest c51f86c28340 4 weeks ago 1.109 MB
1.1 Docker Run
Excellent! Now let's run the Dockercontainer with this image. To do this, use the magic command
docker run:
the$ docker run busybox $
Wait, nothing happened! This is a bug? Well, no. Under the hood a lot has happened. Docker client found the image (in our case, busybox), loaded the container and runs the command within the container. We did
docker run busybox, but does not have any commands, so that the container is loaded, run the blank command, and the program ended. Well, yeah, that's a shame, so let's do something more interesting.
the$ docker run busybox echo "hello from busybox" hello from busybox
Hooray, finally some conclusion. In our case the client is the Docker dutifully runs the command
echoinside the container, and then came out of it. You probably noticed that it all happened very quickly. Now imagine how to download a virtual machine, to run command and disable it. Now it is clear why they say that the containers fast!
Now let's look at the command
docker ps. It displays a list of all running containers.
the$ docker ps CONTAINER ID IMAGE COMMAND CREATED STATUS PORTS NAMES
Containers is not, therefore, displays an empty string. Not very useful, so let's run a more useful option:
docker ps-a
the$ docker ps-a CONTAINER ID IMAGE COMMAND CREATED STATUS PORTS NAMES 305297d7a235 busybox "uptime" 11 hours ago Exited (0) 11 minutes ago distracted_goldstine ff0a5c3750b9 busybox "sh" 12 minutes ago Exited (0) 12 minutes ago elated_ramanujan
Now see the list of all containers that we have launched. In column
STATUSyou may notice that the container has completed its work a few minutes ago.
You are probably wondering how to run more than one command in a container. Let's try:
the$ docker run -it busybox sh / # ls bin dev etc home proc root sys tmp usr var / # uptime 05:45:21 up 5:58, 0 users, load average: 0.00, 0.01, 0.04
the Command
runwith the flag-itconnects interactive tty in the container. You can now run a lot of commands inside. Try it.
Danger!: If you want thrills, you can try
rm-rf binin the container. But make sure to run it inside the container, and not outside. If you do this outside, on your computer, it will be very bad, and commands likels,echowill stop working. When inside the container will cease to work, just come out and restart the commanddocker run -it busybox sh. Docker creates a new container at startup, so it will work again.
In this exciting tour of the possibilities of the command
docker runis finished. Most likely, you will use this command quite often. So it is important that we understand how to handle it. To learn more about therun, usedocker run --help, and will see a full list of supported flags. Soon we will see some ways to usedocker run.
Before continuing, let's briefly consider the removal of containers. We saw above that using the command
docker ps-ayou can still see the remnants of the completed containers. Throughout this manual, you will rundocker runmultiple times, and remaining, homeless containers will eat up disk space. So I made it a rule to remove the containers after you are done with them. To do this, use the commanddocker rm. Just copy the ID (or several) from the above output and pass parameters to the command.
305297d7a235 ff0a5c3750b9
If you delete the IDs will again be displayed. If you want to remove a lot of containers, instead of manual copy and paste you can do this:
the$ docker rm $(docker ps-a -q-f status=exited)
This command removes all containers that have the status
exited. The flag-qreturns only the numerical ID, and the flag-ffilters the output based on the provided conditions. The last useful item is thedocker run, you can pass the flag--rm, the container will automatically be deleted upon termination. This is very useful for one-off runs and experiments with Docker.
you can Also delete unnecessary images with
docker rmi.
1.2 Terminology
In the previous section we used a lot of Docker-specific jargon, and many that could be confusing. Before continuing, let's examine some of the terms that are frequently used in the ecosystem of Docker.
the
Images (images) - Schema of our application, which are the basis of containers. In the above example we used the command
docker pullto download the image busybox.Containers (containers) is Generated based on the image and launch the app itself. We have created a container with
docker run, and used the busybox image that you downloaded earlier. The list of running containers can be seen with the commanddocker ps.Docker Daemon (the Docker daemon) Is a Background service running on the host machine, which is responsible for creating, running and destroying Docker containers. A daemon is a process that is running on the operating system interoperates with the client.
Docker Client (Docker client) Is a command-line Utility that allows the user to interact with the demon. There are other forms of the client, for example, Kitematic, with a graphical interface.
Docker Hub - the Register Docker images. Roughly speaking, the archive of all available images. If necessary, can contain its own register and use it to receive images.
2.0 the Web application and Docker
Super! Now we have learned how to work with
docker run, played with several containers and sorted out the terminology. Armed with this knowledge, we are ready to move on to real pieces: deploy web applications with Docker!
2.1 Static sites
Let's start small. First, consider the simplest static web site. Download the image from Docker Hub, run the container and see how easy it is to start the web server.
there you Go. For single page site we need the image that I have created for this benefit and placed in the the register -
prakhar1989/static-site. You can download the image directly withdocker run.
the$ docker run prakhar1989/static-site
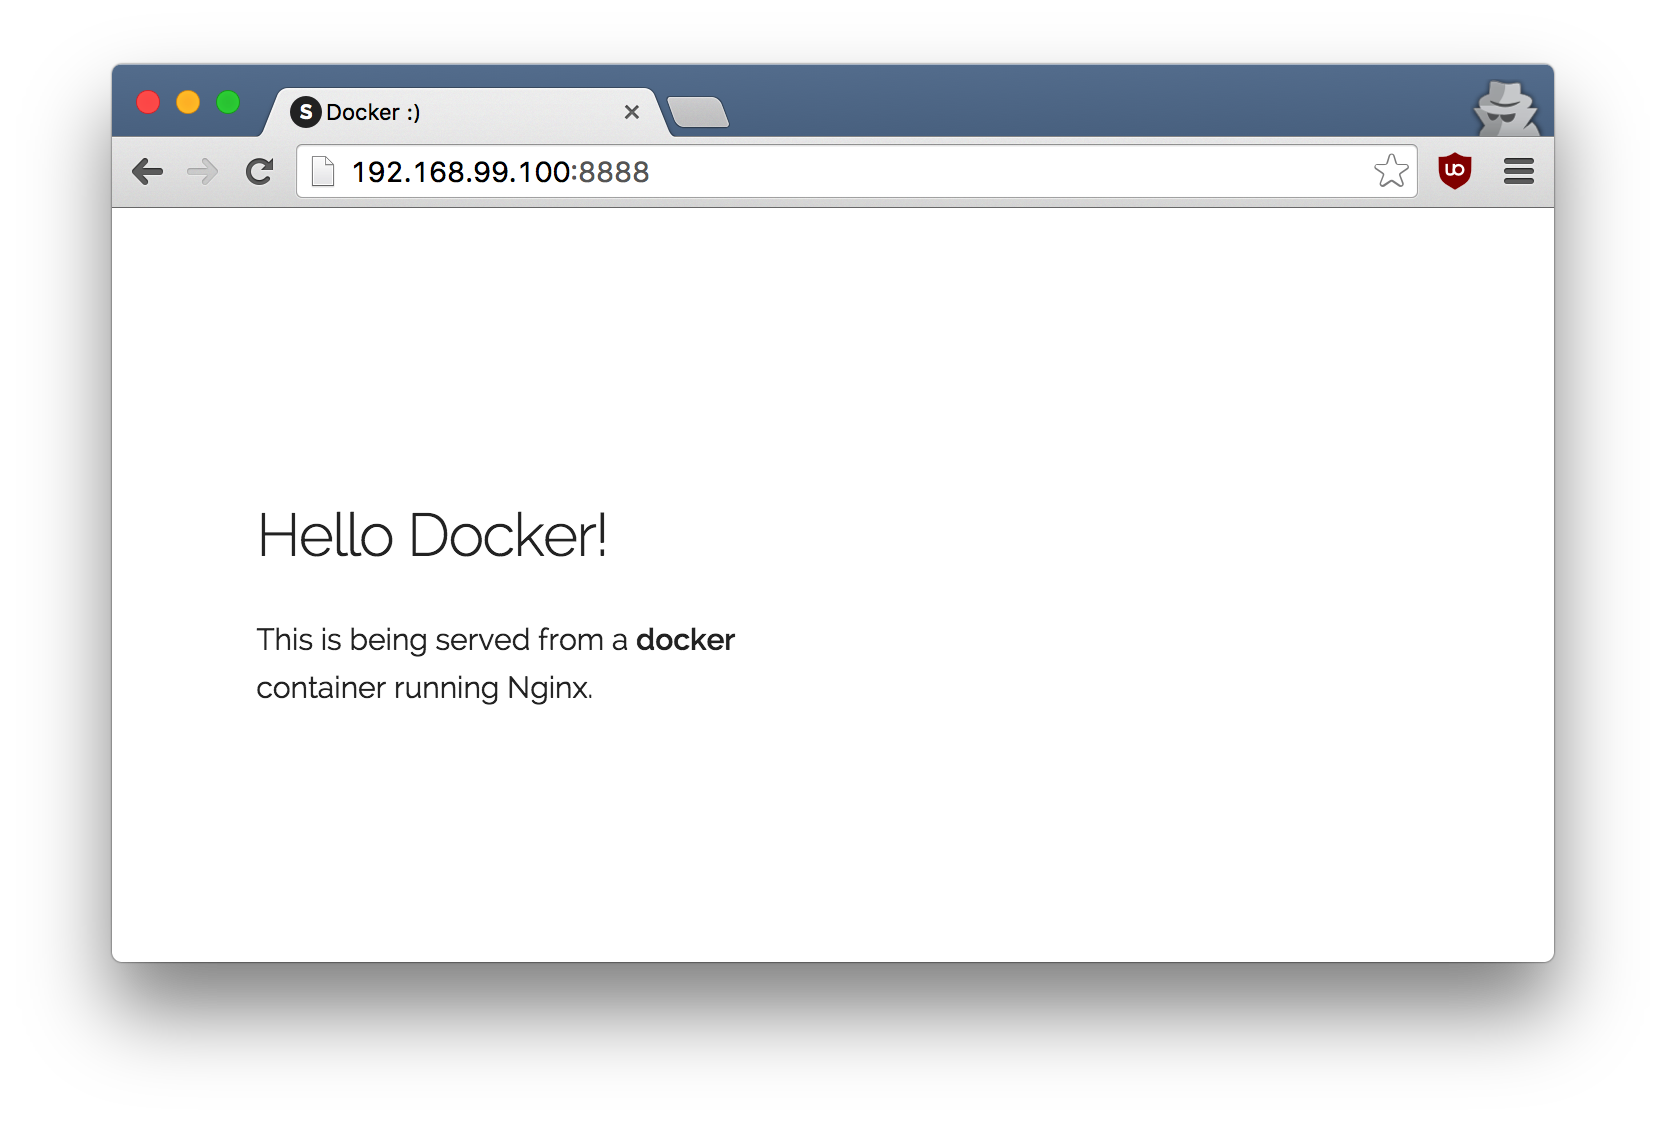
because the image does not exist locally, the client first downloads the image from the register, and then launch it. If no problems, then you will see the message
Nginx is running...in the terminal. Now the server is running. How to see the site in action? Which port the server is running? And, most important, directly to reach the container from the host container.
In our case the client does not open any ports, so you will need to restart the command
docker runto make ports public. At the same time let's make sure that the terminal was not attached to a running container. In this case, you can safely close the terminal, and the container will continue to work. It's called detached mode.
the$ docker run-d-P --name static-site prakhar1989/static-site e61d12292d69556eabe2a44c16cbd54486b2527e2ce4f95438e504afb7b02810
the Flag
-ddetach (detach) the terminal flag-Pwill make all the ports open public and random, and finally, the flag--nameis the name that we want to give the container. Now you can see the ports with the commanddocker port [CONTAINER].
80/tcp - > 0.0.0.0:32769 443/tcp - > 0.0.0.0:32768
Open the http://localhost:32769 in your browser.
Note: If you use docker toolbox, you may need to use
docker-machine default ipto obtain the IP address.
can Also indicate your port. The client will redirect the connection to it.
the$ docker run-p 8888:80 prakhar1989/static-site Nginx is running...
to stop the container, run the
docker stopand specify the identifier (ID) of the container.
Agree, it's very simple. To deploy it on a real server, you just need to install Docker and run the command above. Now that you've seen how to run a web server inside the image, you're probably wondering — how to create your Docker image? We will explore this topic in the next section.
2.2 Images
We touched on images earlier, but in this section we will look deeper: what is Docker images and how to create your own images. Finally, we use our own way to run the app locally, and then zaleplon him on AWS to show your friends. Cool? Cool! Let's get started.
Images is the basis for containers. In the last example we have downloaded (pull) called Busybox from the register, and asked the client for Docker to start the container on this image. To see a list of available images locally, use the command
docker images.
the$ docker images REPOSITORY TAG IMAGE ID CREATED VIRTUAL SIZE prakhar1989/catnip latest c7ffb5626a50 2 hours ago 697.9 MB prakhar1989/static-site latest b270625a1631 21 hours ago 133.9 MB python 3-onbuild cf4002b2c383 5 days ago 688.8 MB martin/docker-cleanup-volumes latest b42990daaca2 7 weeks ago 22.14 MB ubuntu latest e9ae3c220b23 7 weeks ago 187.9 MB busybox latest c51f86c28340 9 weeks ago 1.109 MB hello-world latest 0a6ba66e537a 11 weeks ago 960 B
This is a list of images that I downloaded from the register, as well as those I made for myself (we will see soon how to do it). the
TAGis a concrete picture or a snapshot (snapshot) image andIMAGE IDis a corresponding unique image ID.
For simplicity, you can treat the image as a git repository. The images can committing with the changes, and you can have multiple versions. If you do not specify a specific version, the client uses the default
latest. For example, you can download a specific version of the image,ubuntu:
the$ docker pull ubuntu:12.04
to get the new Docker image, you can download it from the registry (such as Docker Hub) or create your own. Docker Hub there are tens of thousands of images. You can search directly from the command line with
docker search.
it is Important to understand the difference between base and child images:
thethe
- Base images (base images) are images which do not have a parent image. Usually they are images of the operating system such as ubuntu, busybox or debian.
the- Child images (subsidiary images) are images constructed on the base images, and with additional functionality.
There are official and custom images, and any of them can be base and child.
thethe
- Official images — these are images which are officially supported by Docker team. Usually their name is one word. In the list above
thepython,ubuntu,busyboxandhello-world— base image.- Custom images — the images created by ordinary users like you and me. They are built on the base images. Usually, they are named in the format
user/image-name.
2.3 Our first image
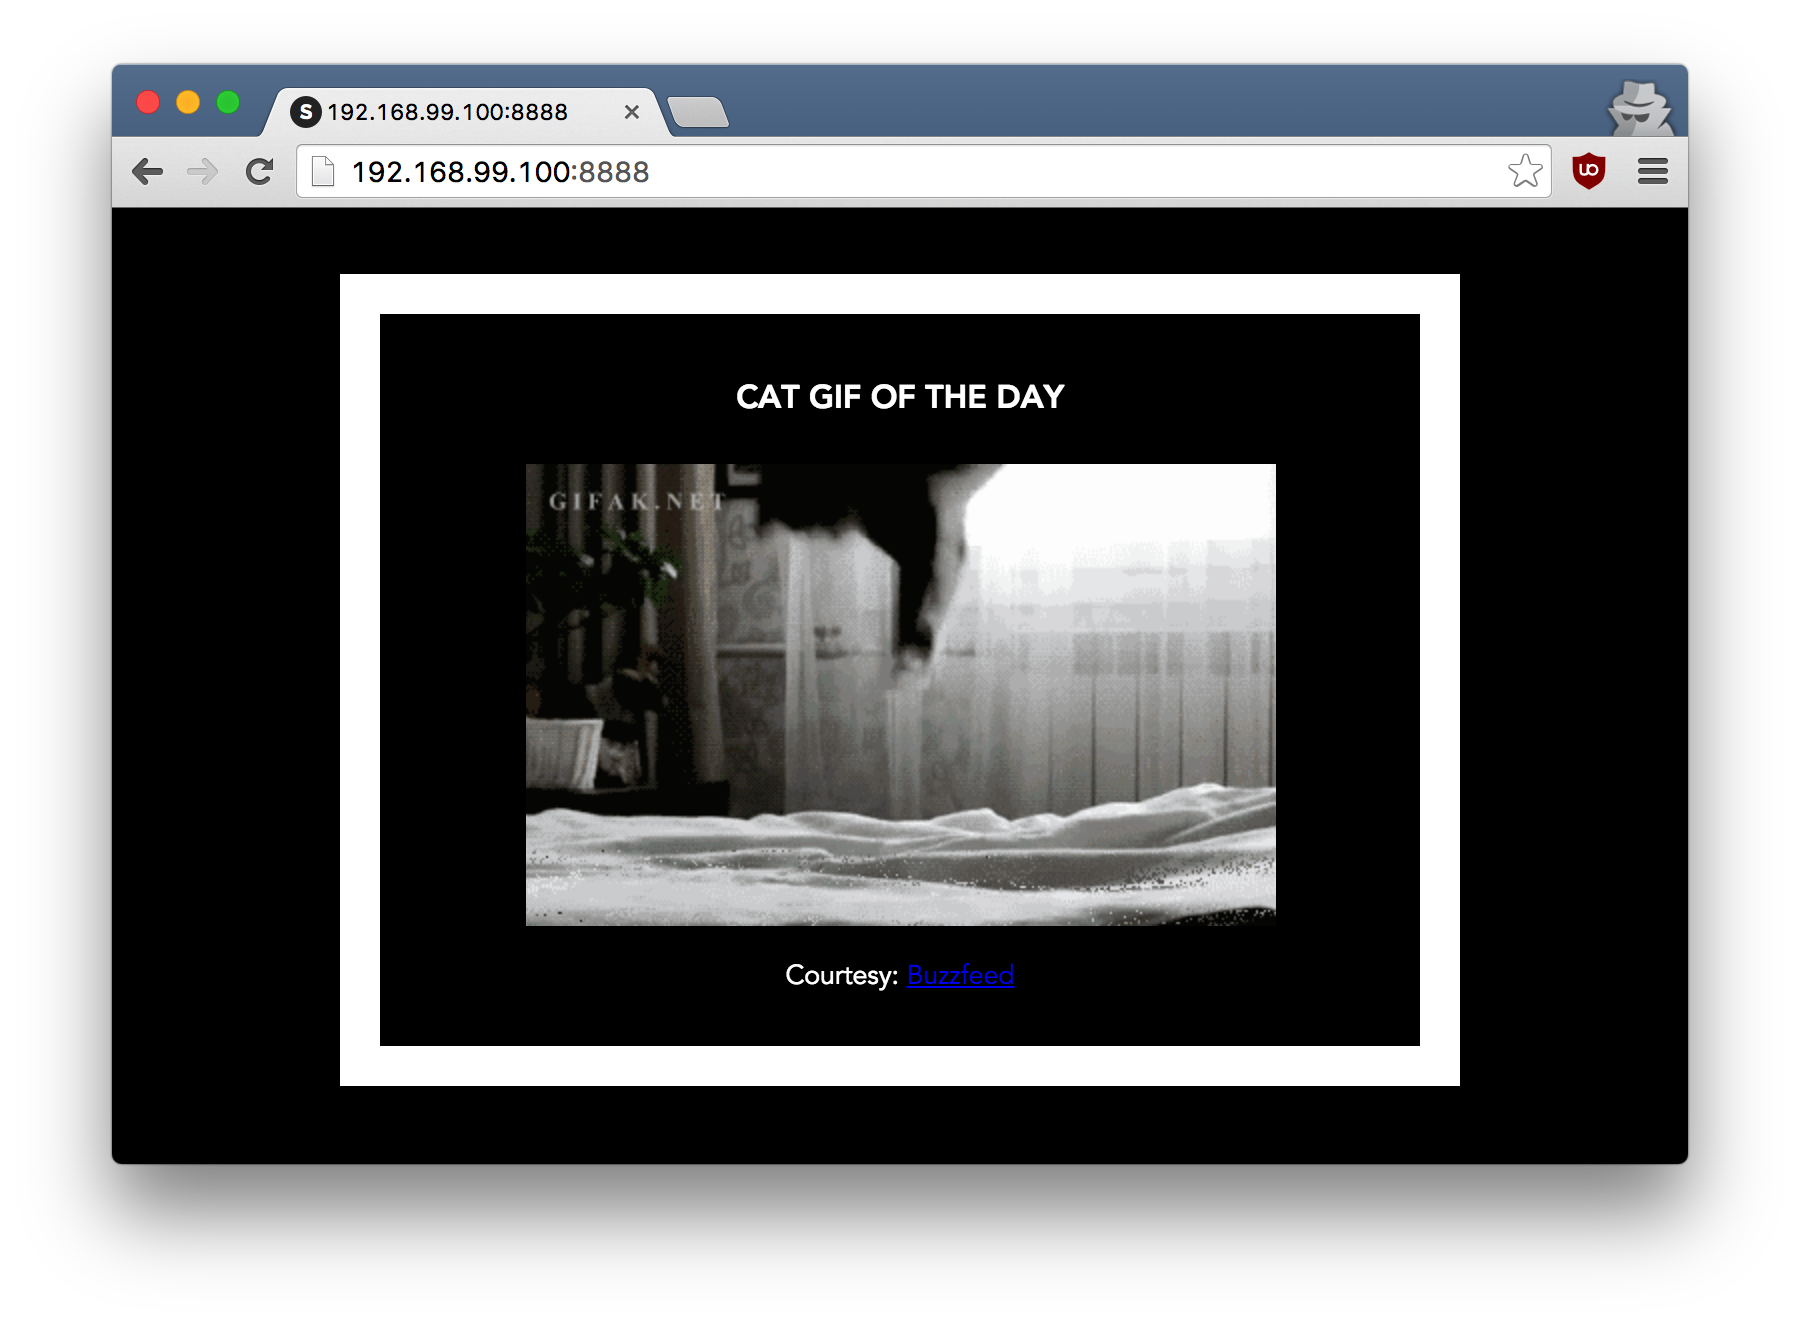
Now that we have a better understanding of what images and what they are, it's time to create your own image. The objective of this section is to create an image with a simple application to Flask. For this guide I did a little application, which displays a random GIF with the cat. Well, because who doesn't love cats? Clone this repository to your local machine.
the$ cd flask-app $ pip install -r requirements.txt $ python app.py * Running on http://0.0.0.0:5000/ (Press CTRL+C to quit)
If everything is OK, you will see the output as in the example above. Go to http://localhost:5000 to see the app in action.
Note: If the command
pip installcrashes with the error "permission denied", then try to start it withsudo. If you do not want to install custom packages at the system level, use the commandpip install --user -r requirements.txt.
Looks great, right? Now we need to create an image with the app. As mentioned above, all user images based on the base image. Since our application is written in Python, we need a base image Python 3. In particular, we need a version of
python:3-onbuildof the base image with Python.
What version of
onbuild, you ask?
These images include multiple ONBUILD triggers, which is usually enough to quickly deploy the application. When the Assembly is copied to the file
requirements.txtwill runpip installwith this file, and then the current directory will be copied to/usr/src/app.
in Other words, the version of
onbuildcontains helpers, which automatiseret boring processes run the application. Instead of having to manually perform these tasks (or write scripts), images do everything for you. We now have all the ingredients to create your image of: running the web application and the base image. How to do it? Answer: to use a Dockerfile.
2.4 Dockerfile
Dockerfile is a simple text file that contains a list of commands Docker client. This is a simple way to automate the process of creating the image. The great thing about team Dockerfile almost are identical to their counterparts in Linux. This means that, in principle, do not need to learn any new syntax to begin working with deckerville.
In the directory with the application there is a Dockerfile, but since we do everything for the first time, we need to create it from scratch. Create a new empty file in your favorite text editor and save it in the same directory where flask-app. Name the file
Dockerfile.
To begin, specify the base image. To do this, use the keyword
FROM.
theFROM python:3-onbuild
More usually, the commands to copy files and install dependencies. But fortunately,
onbuild-the version of the base image is taking these tasks on yourself. Further, we need to specify which port should be open. Our app running on port 5000, so let's specify it:
theEXPOSE 5000
the Last step is to specify the command to run the application. It's just
python ./app.py. To do this, use the command CMD
theCMD ["python", "./app.py"]
the Main purpose of
CMDis to tell the container what commands you need to run at startup. Now ourDockerfileis ready. Here's how it looks:
the# our base image FROM python:3-onbuild # specify the port number the container should expose EXPOSE 5000 # run the application CMD ["python", "./app.py"]
Now you can create image. The command
docker buildis engaged in the challenging task of creating the image based onDockerfile.
the Listing below demonstrates the process. Before you run the command yourself (don't forget the dot at the end), check to see your username instead of mine. Username must match what was used when registering on Docker hub. If you have not registered, do so before executing the command. The command
docker buildis quite simple: it takes an optional tag with the flag-tand the path to the directory containing theDockerfile.
the$ docker build-t prakhar1989/catnip . Sending build context to Docker daemon 8.704 kB Step 1 : FROM python:3-onbuild # Executing 3 build triggers... - - - >Using cache Step 1 : RUN pip install --no-cache-dir -r requirements.txt - - - >Using cache Step 1 : COPY . /usr/src/app ---> 1d61f639ef9e Removing intermediate container 4de6ddf5528c Step 2 : EXPOSE 5000 ---> Running in 12cfcf6d67ee ---> f423c2f179d1 Removing intermediate container 12cfcf6d67ee Step 3 : CMD python ./app.py ---> Running in f01401a5ace9 ---> 13e87ed1fbc2 Removing intermediate container f01401a5ace9 Successfully built 13e87ed1fbc2
If you don't have the image
python:3-onbuild, the client will first download it and then undertake the creation of your image. So, the display may differ from mine. Look carefully and you will find the onbuild triggers. If all goes well, the image is ready! Rundocker imagesand you will see your image in the list.
the Last step is to run the image and see if it works (replace your username):
the$ docker run-p 8888:5000 prakhar1989/catnip * Running on http://0.0.0.0:5000/ (Press CTRL+C to quit)
Go to the specified URL and will see the application in work.
Congratulations! You have successfully created your first Docker image!
2.5 Docker on AWS
What good is the application that should not show friends, right? So in this section we will learn how to deplot our awesome app in the cloud. Will use AWS Elastic Beanstalk to solve this problem in a couple of clicks. We will see how to use Beanstalk is easy to manage and scale our application.
Docker push
the First thing to do before deploym on AWS is to publish our way to the register, so you can download it from AWS. There are several Docker-register (or you can create private). For starters, let's use Docker Hub. Simply run:
the$ docker push prakhar1989/catnip
If this is your first publication, then the client will ask you to login. Enter the same information that you use to sign in to Docker Hub.
the$ docker login Username: prakhar1989 WARNING: login credentials are saved in the /Users/prakhar/.docker/config.json Login Succeeded
don't forget to change the title image on their own. It is very important to keep the format
username/image_namethat the client knew where to publish the image.
After this, you can see your image on the Docker Hub. For example, here is a page my way.
Note: one important point that should clarify before I go any further, not necessarily to store the image in a public register (or any register at all) to deplot on AWS. If you are writing code for the next multimillion-dollar startup unicorn, you can skip this step. We published your image to simplify deployment, missing a few configuration steps.
Now our image online, and any Docker client can play with them using simple command:
the$ docker run-p 8888:5000 prakhar1989/catnip
If you suffer with installing your work environment and attempts to share his configuration with colleagues, you realize how cool it sounds. That's why Docker is power!
Beanstalk
AWS Elastic Beanstalk (EB) is a PaaS (Platform as a Service — platform as a service) from Amazon Web Services. If you have used Heroku, Google App Engine, etc., then everything will be familiar. As a developer, you tell EB how to start your application, and EB's doing everything else, including scaling, monitoring, and even service packs installed. In April 2014, EB has added the ability to run Docker containers, and we will use this opportunity for deployment. EB have a very clear the command-line interface, but it requires some configuration, so for simplicity let's use the web interface to run our application.
to proceed, you need an account on AWS. If you don't have one, create it. For this you will need to enter credit card information. But don't worry, this service is free, and all that will happen under this benefit is also free of charge.
thethe
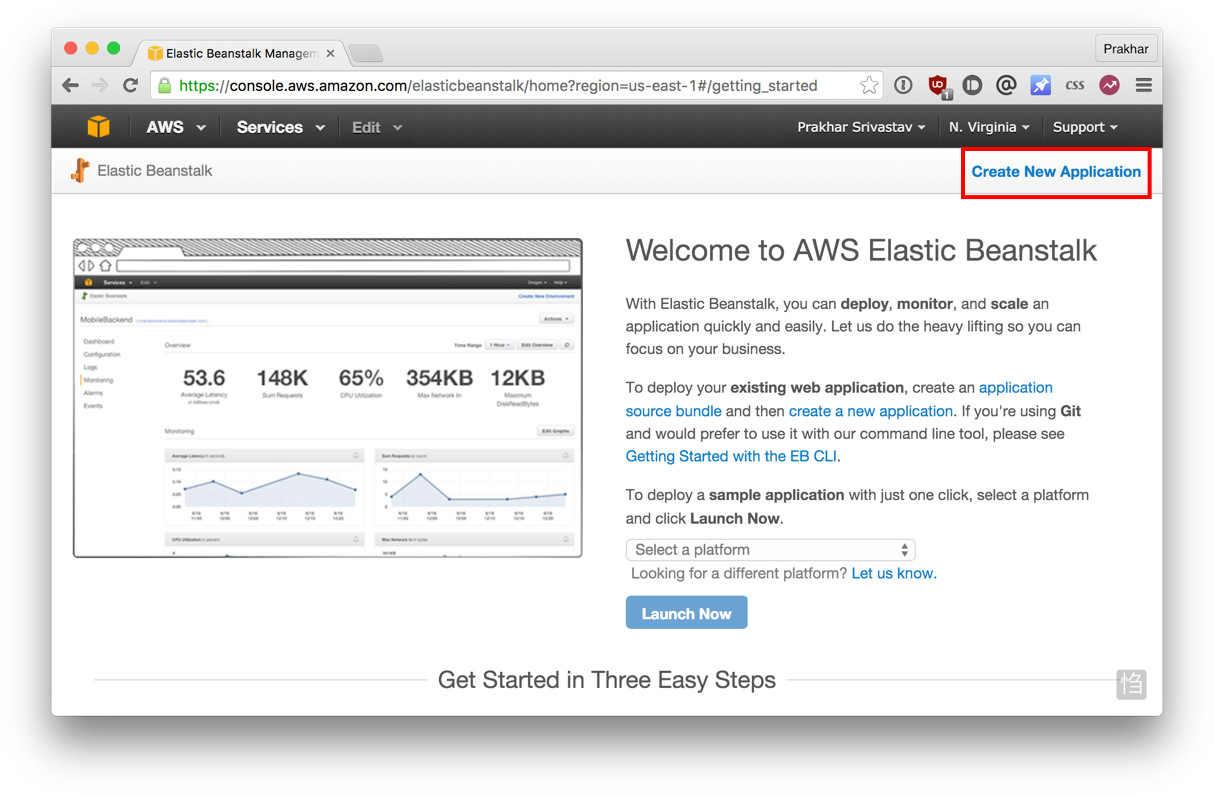
- Log into your AWS console.
the- Click on Elastic Beanstalk. The link is in the compute section, in the upper left corner. Or just go here.
thethe
- Click on "Create New Application" in the upper right corner.
the- Give your app a catchy (but unique) name, and if you want, add a description.
the- on the screen New Environment select Web Server Environment.
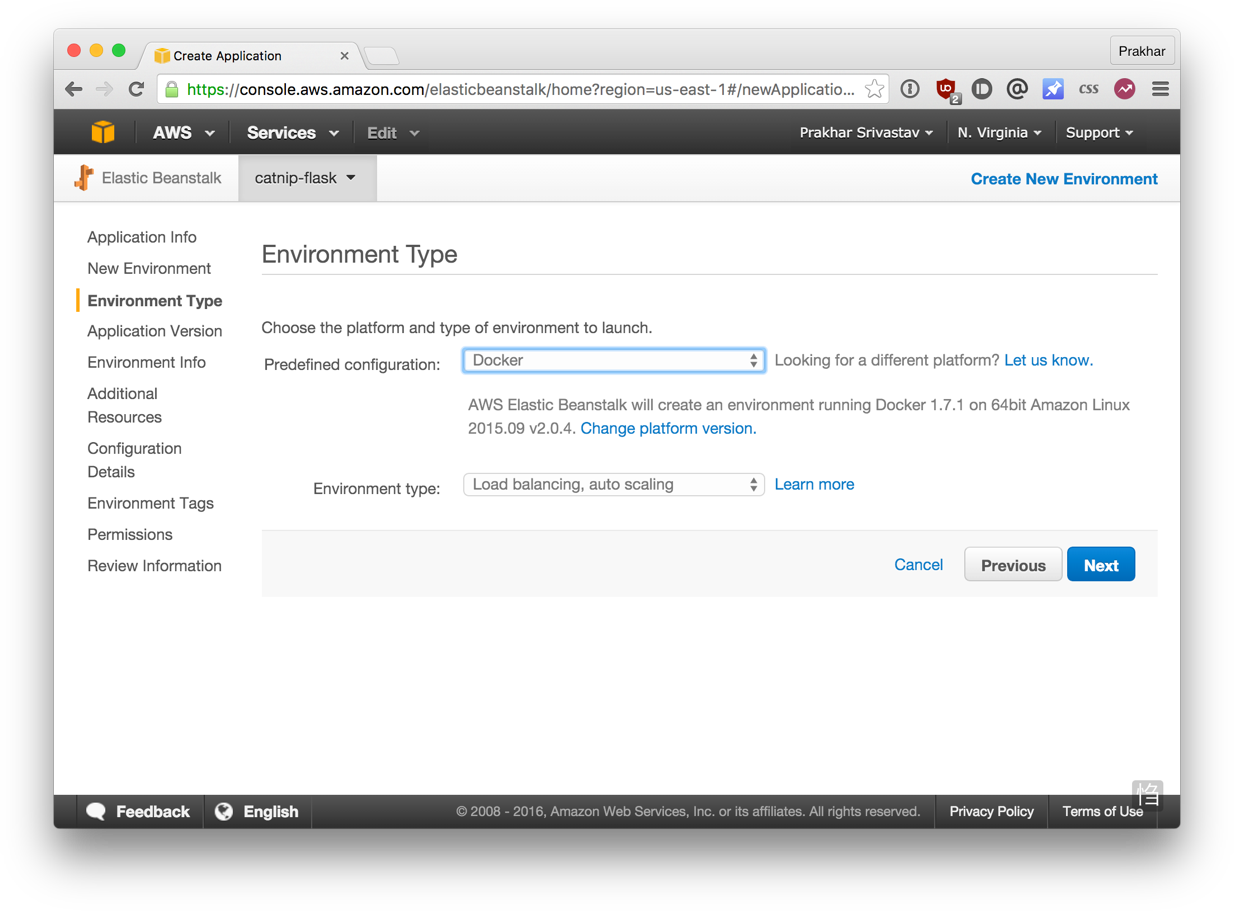
the- , the Following screen shown below. Select Docker of the configuration. You can leave the Environment type as it is. Click Next.
thethe
- Here we tell the system EB on our way. Open file Dockerrun.aws.json in the directory
theflask appand changeNameof the image to match the name of your image. Don't worry, I'll describe the contents of the file later. Then select "upload your own" and select your file.- Next, select the environment name and URL. This URL you can give to your friends, so try to come up with something simpler.
the- is not going to make any edits to the section Additional Resources. Click Next and proceed to the Configuration Details.
the- In this section you need to choose instance type
thet1.micro. This is very important because it is free from AWS. If you want, you can select a key pair to log in. If you don't know what that means then don't worry and just skip this part. Everything else can be left default and continue.- Also do not need to specify any Environment Tags and Permissions, so just click Next twice in a row. At the end of the screen Review. If all looks OK, then click Launch.
the- On the last screen will be a few spinners. It rises and configured your environment. Usually, it takes about five minutes for the first set.
While waiting, let's take a look at the file
Dockerrun.aws.json. This is the file for AWS, which is information about application configuration Docker. EB receives information from this file.
the{ "AWSEBDockerrunVersion": "1", "Image": { "Name": "prakhar1989/catnip", "Update": "true" }, "Ports": [ { "ContainerPort": "5000" } ], "Logging": "/var/log/nginx" }
the File is pretty self explanatory, but you can always turn to official documentation. Specify the name of the image, and EB will use it along with the port.
at this point, the instance must already be ready. Go to EB and see a green indicator successfully run the application.
Go to the specified URL in a browser and see the app in all its glory. Send the address to your friends so that everyone can enjoy sifco with cats.
Congratulations! You tadalail its first Docker app! It may seem that there were a lot of steps, but with the command EB utility you can simulate the functionality of Heroku a few keystrokes. I hope you will agree that Docker greatly simplifies the process and minimizes the painful moments of the deployment to the cloud. I suggest you to read AWS documentation about single-container Docker environment to understand what opportunities exist in EB.
next, the last part of the book, we'll go a little further and zaleplon the app close to the real world. It will be a permanent back-end storage. Go!
3.0 Mnogochislennye environment
In the last section we saw how to easily run applications using Docker. We started with a simple static site, and then run Flask app. Both options can be run locally or in the cloud, multiple teams. A common feature of these applications: each of them worked container.
In particular, we will see how to run and manage mnogochislennymi Docker environments. Why you need multiple containers, you ask? Well, one of the main ideas of Docker is that it provides insulation. The idea of combining the process and its dependencies in a sandbox (called a container) and makes Docker a powerful tool.
same as the app split should contain a single services in separate containers. Different parts likely to require different resources, and requirements can grow with different speed. If we split these parts and place them in different containers, each part of the application can be built using the most suitable resource type. It also combines well with the idea micro services. This is one of the reasons that Docker (or any other technology of containerization) is located on the Peredovoy modern micro-service architectures.
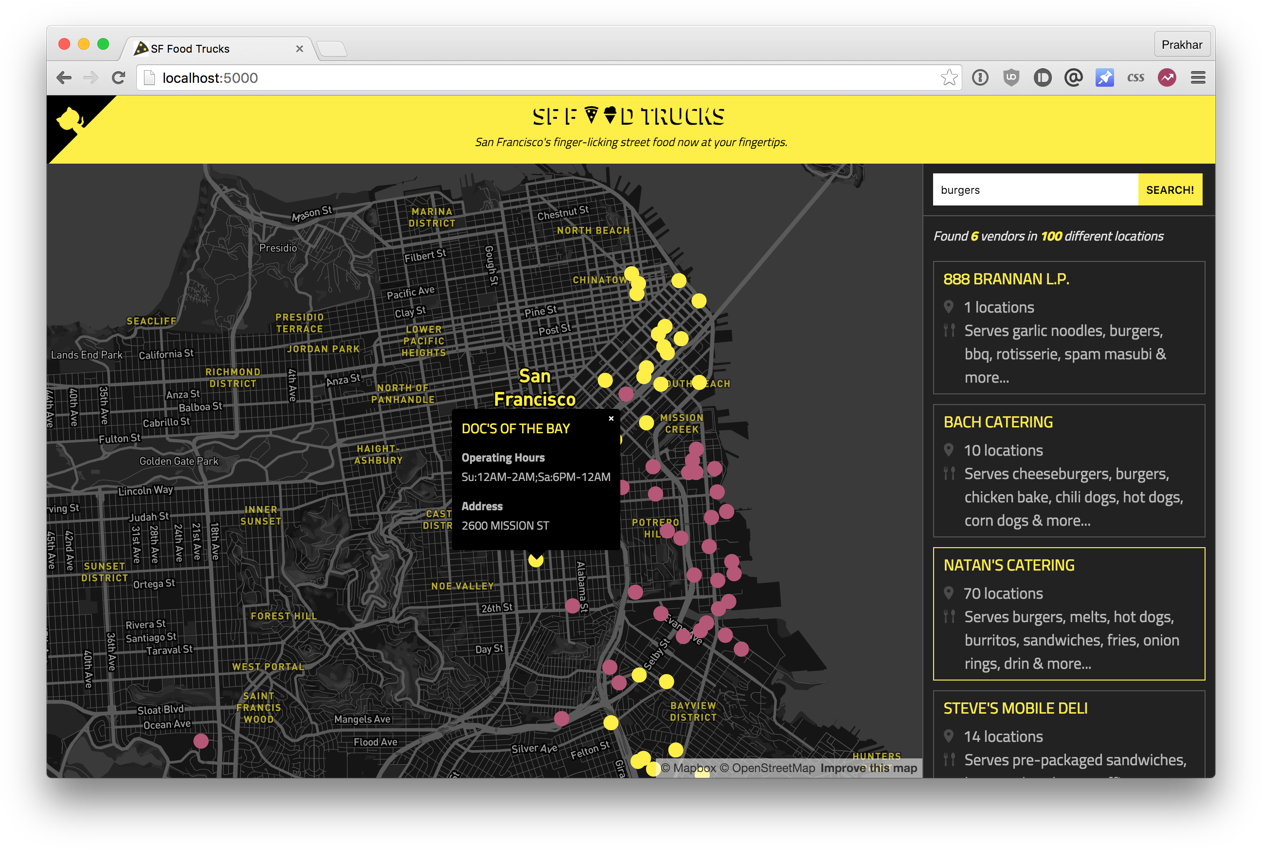
3.1 SF Food Trucks
the Application that we will translate in Docker, called SF Food Trucks (unfortunately, now the app no longer works publicly — approx. lane). My goal was to do something useful (and similar to the present application from the real world), something that uses at least one service, but not too complex for this Handbook. Here's what I came up with.
the Backend app is written in Python (Flask) and search for Elasticsearch. Like everything else in this tutorial, the code is on the Github. We use this app to learn to run and a lot deplait-container environment.
Now that you've got (I hope), let's think about how it will look in the process. Our app has a backend for Flask and Elasticsearch. Obviously, it is possible to divide the application into two containers: one for the Flask, the other for the Elasticsearch (ES). If the app becomes popular, it will be possible to add new containers in the right place, looking where will be a bottleneck.
OK, so you need two containers. It is not difficult, right? We have created a Flask-container in the last section. And for Elasticsearch... let's see if there's anything in the hub:
the$ docker search elasticsearch NAME DESCRIPTION STARS OFFICIAL AUTOMATED elasticsearch Elasticsearch is a powerful open source se... 697 [OK] itzg/elasticsearch Provides an easily configurable Elasticsea... 17 [OK] tutum/elasticsearch Elasticsearch image - listens in port 9200. 15 [OK] barnybug/elasticsearch Elasticsearch Latest 1.7.2 and previous re... 15 [OK] digitalwonderland/Latest elasticsearch Elasticsearch with Marvel & Kibana 12 [OK] monsantoco/elasticsearch ElasticSearch Docker image 9 [OK]
Not surprisingly, there are formal image to Elasticsearch. To start ES, you only need to run
docker run, and soon we will have a local running container with one node ES.
the$ docker run-dp 9200:9200 elasticsearch d582e031a005f41eea704cdc6b21e62e7a8a42021297ce7ce123b945ae3d3763 $ curl 0.0.0.0:9200 { "name" : "Ultra-Marine", "cluster_name" : "elasticsearch", "version" : { "number" : "2.1.1", "build_hash" : "40e2c53a6b6c2972b3d13846e450e66f4375bd71", "build_timestamp" : "2015-12-15T13:05:55Z", "build_snapshot" : false, "lucene_version" : "5.3.1" }, "tagline" : "You Know, for Search" }
at the same time davayt Article based on information from habrahabr.ru


Комментарии
Отправить комментарий